
This role will install and configure MySQL server or MySQL in HA mode using MySQL InnoDB Cluster or GTID replication
Table of Contents
- Role Variables
- Vagrant up, build the test infrastructure
- Ansible setup and pre-flight check
- Deploy MySQL InnoDB Cluster
- Cluster high availability check
- Restore from complete outage
- Clean up
Role Variables
The role accept this variables:
| Var | Required | Default | Desc |
|---|---|---|---|
mysql_subnet |
yes |
192.168.25.0/24 |
Subnet where MySQL will be listen. If the VM or bare metal server has more than one interface, Ansible will filter the interface and MySQL wil listen only on a specific interface. This variable is also used to calculate the MySQL server ID. |
mysql_root_pw |
yes |
`` | MySQL root password. |
mysql_authentication |
no |
mysql_native_password |
MySQL authentication method. |
disable_firewall |
no |
no |
If set to yes Ansible will disable the firewall. |
disable_selinux |
no |
no |
Disable SELinux. Default no, if you want to configure SELinux use another Role. You can disable SELinux setting this variable to yes |
resolv_mode |
no |
dns |
How MySQL resolve the names, default dns. If set to host the /etc/hosts file will be overwritten |
mysql_listen_all_interfaces |
no |
no |
Set this variable to yes to allow MySQL to listen on all interfaces 0.0.0.0/0. Otherwise the listen ip address will be retrieved using mysql_subnet variable |
mysql_user |
no |
mysql |
MySQL system user |
mysql_group |
no |
mysql |
Group of the MySQL search system user |
mysql_data_dir |
no |
/var/lib/mysql |
MySQL data dir |
mysql_log_dir |
no |
/var/log/mysql |
MySQL log dir |
mysql_conf_dir |
no |
/etc/mysql |
MySQL conf dir |
mysql_pid_dir |
no |
/var/run/mysqld |
MySQL pid dir |
mysql_operator_user |
no |
operator |
MySQL operator user, used to bootstrap MySQL InnoDB Cluster. |
mysql_operator_password |
no |
Op3r4torMyPw |
Password of operator user |
mysql_replica_user |
no |
replica |
MySQL replica user. Used for all the replica operations |
mysql_replica_password |
no |
rEpL1c4p4Sw0,rd |
Password of replica user |
mysql_replication_mode |
no |
`` | InnoDB Cluster, GTID, Empty/None (default) |
mysql_gr_name |
no |
`` | Required if mysql_replication_mode is set to InnoDB Cluster. UUID of the Group Replication |
mysql_gr_vcu |
no |
`` | Required if mysql_replication_mode is set to InnoDB Cluster. Group Replication view change uuid |
mysql_innodb_cluster_name |
no |
`` | Required if mysql_replication_mode is set to InnoDB Cluster. The name of MySQL InnoDB Cluster |
Vagrant up, build the test infrastructure
To test this role we use Vagrant and Virtualbox, but if you prefer you can also use your own VMs or your baremetal machines.
The first step is to download this repo and birng up all the VMs. But first in the Vagrantfile paste your public ssh key in the CHANGE_ME variable. You can also adjust the number of the vm deployed by changing the NNODES variable (in this exaple we will use 5 nodes). Now we are ready to provision the machines:
git clone https://github.com/garutilorenzo/ansible-role-linux-mysql.git

cd ansible-role-linux-mysql/

vagrant up
Bringing machine 'my-ubuntu-0' up with 'virtualbox' provider...
Bringing machine 'my-ubuntu-1' up with 'virtualbox' provider...
Bringing machine 'my-ubuntu-2' up with 'virtualbox' provider...
Bringing machine 'my-ubuntu-3' up with 'virtualbox' provider...
Bringing machine 'my-ubuntu-4' up with 'virtualbox' provider...

[...]
[...]

    my-ubuntu-4: Inserting generated public key within guest...
==> my-ubuntu-4: Machine booted and ready!
==> my-ubuntu-4: Checking for guest additions in VM...
    my-ubuntu-4: The guest additions on this VM do not match the installed version of
    my-ubuntu-4: VirtualBox! In most cases this is fine, but in rare cases it can
    my-ubuntu-4: prevent things such as shared folders from working properly. If you see
    my-ubuntu-4: shared folder errors, please make sure the guest additions within the
    my-ubuntu-4: virtual machine match the version of VirtualBox you have installed on
    my-ubuntu-4: your host and reload your VM.
    my-ubuntu-4:
    my-ubuntu-4: Guest Additions Version: 6.0.0 r127566
    my-ubuntu-4: VirtualBox Version: 6.1
==> my-ubuntu-4: Setting hostname...
==> my-ubuntu-4: Configuring and enabling network interfaces...
==> my-ubuntu-4: Mounting shared folders...
    my-ubuntu-4: /vagrant => C:/Users/Lorenzo Garuti/workspaces/simple-ubuntu
==> my-ubuntu-4: Running provisioner: shell...
    my-ubuntu-4: Running: inline script
==> my-ubuntu-4: Running provisioner: shell...
    my-ubuntu-4: Running: inline script
    my-ubuntu-4: hello from node 5
Ansible setup and pre-flight check
Now if you don’t have Ansible installed, install ansible and all the requirements:
apt-get install python3 python3-pip uuidgen openssl
pip3 install pipenv

pipenv shell
pip install -r requirements.txt
Now with Ansible installed we can download the role directly from GitHub:
ansible-galaxy install git+https://github.com/garutilorenzo/ansible-role-linux-mysql.git
Whit Ansible and the role installed we can setup our inventory file (hosts.ini):
[mysql]
my-ubuntu-0 ansible_host=192.168.25.110
my-ubuntu-1 ansible_host=192.168.25.111
my-ubuntu-2 ansible_host=192.168.25.112
my-ubuntu-3 ansible_host=192.168.25.113
my-ubuntu-4 ansible_host=192.168.25.114
and the vars.yml file:
---

disable_firewall: yes
disable_selinux: yes
mysql_resolv_mode: hosts
mysql_subnet: 192.168.25.0/24
mysql_listen_all_interfaces: yes

mysql_root_pw: '<CHANGE_ME>' # <- openssl rand -base64 32 | sed 's/=//'
mysql_replication_mode: 'InnoDB Cluster'
mysql_gr_name: '<CHANGE_ME>' # <- uuidgen
mysql_gr_vcu: '<CHANGE_ME>' #  <- uuidgen
mysql_innodb_cluster_name: 'cluster_lab'
NOTE mysql_gr_name and mysql_gr_vcu are different uuid, so run uuidgen twice. With this vars we are going to deploy MySQL in HA Mode with MySQL InnoDB Cluster, the cluster will be created from an existing Group Replication configuration.
The final step before proceed with the installation is to create the site.yml file:
---
- hosts: mysql
  become: yes
  remote_user: vagrant
  roles:
    - role: ansible-role-linux-mysql
  vars_files:
    - vars.yml
Deploy MySQL InnoDB Cluster
We are finally ready to deploy MySQL InnoDB Cluster using ansible:
export ANSIBLE_HOST_KEY_CHECKING=False # Ansible skip ssh-key validation

ansible-playbook -i hosts.ini site.yml -e mysql_bootstrap_host=my-ubuntu-0

TASK [ansible-role-linux-mysql : render mysql.conf.d/mysqld.cnf] *******************************************************************************************
ok: [my-ubuntu-0]
ok: [my-ubuntu-2]
ok: [my-ubuntu-1]
ok: [my-ubuntu-3]
ok: [my-ubuntu-4]

TASK [ansible-role-linux-mysql : render mysql.conf.d/gtid.cnf] *********************************************************************************************
ok: [my-ubuntu-1]
ok: [my-ubuntu-0]
ok: [my-ubuntu-3]
ok: [my-ubuntu-2]
ok: [my-ubuntu-4]

TASK [ansible-role-linux-mysql : ansible.builtin.fail] *****************************************************************************************************
skipping: [my-ubuntu-0]
skipping: [my-ubuntu-1]
skipping: [my-ubuntu-2]
skipping: [my-ubuntu-3]
skipping: [my-ubuntu-4]

TASK [ansible-role-linux-mysql : ansible.builtin.fail] *****************************************************************************************************
skipping: [my-ubuntu-0]
skipping: [my-ubuntu-1]
skipping: [my-ubuntu-2]
skipping: [my-ubuntu-3]
skipping: [my-ubuntu-4]

TASK [ansible-role-linux-mysql : render innodb_cluster.cnf] ************************************************************************************************
ok: [my-ubuntu-0]
ok: [my-ubuntu-1]
ok: [my-ubuntu-3]
ok: [my-ubuntu-2]
ok: [my-ubuntu-4]

RUNNING HANDLER [ansible-role-linux-mysql : reload systemd] ************************************************************************************************
ok: [my-ubuntu-3]
ok: [my-ubuntu-0]
ok: [my-ubuntu-2]
ok: [my-ubuntu-4]
ok: [my-ubuntu-1]

PLAY RECAP *************************************************************************************************************************************************
my-ubuntu-0               : ok=69   changed=27   unreachable=0    failed=0    skipped=12   rescued=0    ignored=0
my-ubuntu-1               : ok=71   changed=28   unreachable=0    failed=0    skipped=10   rescued=0    ignored=0
my-ubuntu-2               : ok=71   changed=28   unreachable=0    failed=0    skipped=10   rescued=0    ignored=0
my-ubuntu-3               : ok=71   changed=28   unreachable=0    failed=0    skipped=10   rescued=0    ignored=0
my-ubuntu-4               : ok=71   changed=28   unreachable=0    failed=0    skipped=10   rescued=0    ignored=0
The cluster is now installed, but we have to persist some configurations. Since the cluster is a new cluster, Ansible has started the Group Replication in bootstrap mode. This means that the first instance (in this case my-ubuntu-0) has te value group_replication_bootstrap_group set to ON, and group_replication_group_seeds set to an empty value. With this second run of Ansible, this variables will be set to the correct values:
ansible-playbook -i hosts.ini site.yml

TASK [ansible-role-linux-mysql : ansible.builtin.fail] *****************************************************************************************************
skipping: [my-ubuntu-0]
skipping: [my-ubuntu-1]
skipping: [my-ubuntu-2]
skipping: [my-ubuntu-3]
skipping: [my-ubuntu-4]

TASK [ansible-role-linux-mysql : ansible.builtin.fail] *****************************************************************************************************
skipping: [my-ubuntu-0]
skipping: [my-ubuntu-1]
skipping: [my-ubuntu-2]
skipping: [my-ubuntu-3]
skipping: [my-ubuntu-4]

TASK [ansible-role-linux-mysql : render innodb_cluster.cnf] ************************************************************************************************
ok: [my-ubuntu-2]
ok: [my-ubuntu-4]
ok: [my-ubuntu-1]
ok: [my-ubuntu-3]
changed: [my-ubuntu-0]

PLAY RECAP *************************************************************************************************************************************************
my-ubuntu-0               : ok=30   changed=1    unreachable=0    failed=0    skipped=18   rescued=0    ignored=0
my-ubuntu-1               : ok=30   changed=0    unreachable=0    failed=0    skipped=18   rescued=0    ignored=0
my-ubuntu-2               : ok=30   changed=0    unreachable=0    failed=0    skipped=18   rescued=0    ignored=0
my-ubuntu-3               : ok=30   changed=0    unreachable=0    failed=0    skipped=18   rescued=0    ignored=0
my-ubuntu-4               : ok=30   changed=0    unreachable=0    failed=0    skipped=18   rescued=0    ignored=0
In this guide mysqlsh is used to make operations on MySQL InnoDB Cluster. Here you can find more information about mysqlsh.
Now we can finally check our cluster:
root@my-ubuntu-0:~# mysqlsh root@my-ubuntu-0
Please provide the password for 'root@my-ubuntu-0': ******************************************
MySQL  localhost:33060+ ssl  JS > clu = dba.getCluster()
MySQL  localhost:33060+ ssl  JS > clu.status()
{
    "clusterName": "cluster_lab",
    "defaultReplicaSet": {
        "name": "default",
        "primary": "my-ubuntu-0:3306",
        "ssl": "DISABLED",
        "status": "OK",
        "statusText": "Cluster is ONLINE and can tolerate up to 2 failures.",
        "topology": {
            "my-ubuntu-0:3306": {
                "address": "my-ubuntu-0:3306",
                "memberRole": "PRIMARY",
                "mode": "R/W",
                "readReplicas": {},
                "replicationLag": "applier_queue_applied",
                "role": "HA",
                "status": "ONLINE",
                "version": "8.0.30"
            },
            "my-ubuntu-1:3306": {
                "address": "my-ubuntu-1:3306",
                "memberRole": "SECONDARY",
                "mode": "R/O",
                "readReplicas": {},
                "replicationLag": "applier_queue_applied",
                "role": "HA",
                "status": "ONLINE",
                "version": "8.0.30"
            },
            "my-ubuntu-2:3306": {
                "address": "my-ubuntu-2:3306",
                "memberRole": "SECONDARY",
                "mode": "R/O",
                "readReplicas": {},
                "replicationLag": "applier_queue_applied",
                "role": "HA",
                "status": "ONLINE",
                "version": "8.0.30"
            },
            "my-ubuntu-3:3306": {
                "address": "my-ubuntu-3:3306",
                "memberRole": "SECONDARY",
                "mode": "R/O",
                "readReplicas": {},
                "replicationLag": "applier_queue_applied",
                "role": "HA",
                "status": "ONLINE",
                "version": "8.0.30"
            },
            "my-ubuntu-4:3306": {
                "address": "my-ubuntu-4:3306",
                "memberRole": "SECONDARY",
                "mode": "R/O",
                "readReplicas": {},
                "replicationLag": "applier_queue_applied",
                "role": "HA",
                "status": "ONLINE",
                "version": "8.0.30"
            }
        },
        "topologyMode": "Single-Primary"
    },
    "groupInformationSourceMember": "my-ubuntu-0:3306"
}
Cluster high availability check
To test the cluster we can use a sample Docker compose stack, the example uses:
- Wordpress as frontend
- mysqlrouter will connect WP to MySQL
To run this test you have to install Docker and Docker compose.
User and Database creation
We need to create one db and one user for wordpress, to do this we have to find the primary server (check the cluster status and find the node with -> “mode”: “R/W”)
root@my-ubuntu-0:~# mysqlsh root@localhost
Please provide the password for 'root@localhost': ******************************************

MySQL  localhost:33060+ ssl  JS > \sql # <- SWITCH TO SQL MODE
Switching to SQL mode... Commands end with ;

create database wordpress;
create user 'wordpress'@'%' identified by 'wordpress';
grant all on wordpress.* TO 'wordpress'@'%';
flush privileges;
Sample Dokcer compose stack
The sample stack can be found in the examples folder, this is the compose file:
version: '3.4'
services:
  wordpress:
    image: wordpress:latest
    ports:
      - 80:80
    restart: always
    environment:
      - WORDPRESS_DB_HOST=mysqlrouter:6446
      - WORDPRESS_DB_USER=wordpress
      - WORDPRESS_DB_PASSWORD=wordpress
      - WORDPRESS_DB_NAME=wordpress

  mysqlrouter:
    image: garutilorenzo/mysqlrouter:8.0.30
    volumes:
      - type: volume
        source: mysqlrouter
        target: /app/mysqlrouter/
        volume:
          nocopy: true
    environment:
     - MYSQL_HOST=my-ubuntu-0
     - MYSQL_PORT=3306
     - MYSQL_USER=root
     - MYSQL_PASSWORD=<CHANGE_ME> # <- the same password in the vars.yml file
     - MYSQL_ROUTER_ACCOUNT=mysql_router_user
     - MYSQL_ROUTER_PASSWORD=<CHANGE_ME> # <- openssl rand -base64 32 | sed 's/=//'
    extra_hosts:
      my-ubuntu-0: 192.168.25.110
      my-ubuntu-1: 192.168.25.111
      my-ubuntu-2: 192.168.25.112
      my-ubuntu-3: 192.168.25.113
      my-ubuntu-4: 192.168.25.114

volumes:
 mysqlrouter:
Now we can start our stack and inspect the logs:
docker-compose -f mysql-router-compose.yml up -d
docker-compose -f mysql-router-compose.yml logs mysqlrouter

examples-mysqlrouter-1  | Succesfully contacted mysql server at my-ubuntu-0. Checking for cluster state.
examples-mysqlrouter-1  | Check if config exist
examples-mysqlrouter-1  | bootstrap mysqlrouter with account mysql_router_user
examples-mysqlrouter-1  | Succesfully contacted mysql server at my-ubuntu-0. Trying to bootstrap.
examples-mysqlrouter-1  | Please enter MySQL password for root:
examples-mysqlrouter-1  | # Bootstrapping MySQL Router instance at '/app/mysqlrouter'...
examples-mysqlrouter-1  |
examples-mysqlrouter-1  | Please enter MySQL password for mysql_router_user:
examples-mysqlrouter-1  | - Creating account(s) (only those that are needed, if any)
examples-mysqlrouter-1  | - Verifying account (using it to run SQL queries that would be run by Router)
examples-mysqlrouter-1  | - Storing account in keyring
examples-mysqlrouter-1  | - Adjusting permissions of generated files
examples-mysqlrouter-1  | - Creating configuration /app/mysqlrouter/mysqlrouter.conf
examples-mysqlrouter-1  |
examples-mysqlrouter-1  | # MySQL Router configured for the InnoDB Cluster 'cluster_lab'
examples-mysqlrouter-1  |
examples-mysqlrouter-1  | After this MySQL Router has been started with the generated configuration
examples-mysqlrouter-1  |
examples-mysqlrouter-1  |     $ mysqlrouter -c /app/mysqlrouter/mysqlrouter.conf
examples-mysqlrouter-1  |
examples-mysqlrouter-1  | InnoDB Cluster 'cluster_lab' can be reached by connecting to:
examples-mysqlrouter-1  |
examples-mysqlrouter-1  | ## MySQL Classic protocol
examples-mysqlrouter-1  |
examples-mysqlrouter-1  | - Read/Write Connections: localhost:6446
examples-mysqlrouter-1  | - Read/Only Connections:  localhost:6447
examples-mysqlrouter-1  |
examples-mysqlrouter-1  | ## MySQL X protocol
examples-mysqlrouter-1  |
examples-mysqlrouter-1  | - Read/Write Connections: localhost:6448
examples-mysqlrouter-1  | - Read/Only Connections:  localhost:6449
examples-mysqlrouter-1  |
examples-mysqlrouter-1  | Starting mysql-router.
examples-mysqlrouter-1  | 2022-08-30 12:03:57 io INFO [7f794f1e0bc0] starting 4 io-threads, using backend 'linux_epoll'
examples-mysqlrouter-1  | 2022-08-30 12:03:57 http_server INFO [7f794f1e0bc0] listening on 0.0.0.0:8443
examples-mysqlrouter-1  | 2022-08-30 12:03:57 metadata_cache_plugin INFO [7f794a606700] Starting Metadata Cache
examples-mysqlrouter-1  | 2022-08-30 12:03:57 metadata_cache INFO [7f794a606700] Connections using ssl_mode 'PREFERRED'
examples-mysqlrouter-1  | 2022-08-30 12:03:57 metadata_cache INFO [7f7948602700] Starting metadata cache refresh thread
examples-mysqlrouter-1  | 2022-08-30 12:03:57 routing INFO [7f790e7fc700] [routing:bootstrap_rw] started: routing strategy = first-available
examples-mysqlrouter-1  | 2022-08-30 12:03:57 routing INFO [7f790e7fc700] Start accepting connections for routing routing:bootstrap_rw listening on 6446
examples-mysqlrouter-1  | 2022-08-30 12:03:57 routing INFO [7f790dffb700] [routing:bootstrap_x_ro] started: routing strategy = round-robin-with-fallback
examples-mysqlrouter-1  | 2022-08-30 12:03:57 routing INFO [7f790dffb700] Start accepting connections for routing routing:bootstrap_x_ro listening on 6449
examples-mysqlrouter-1  | 2022-08-30 12:03:57 routing INFO [7f790effd700] [routing:bootstrap_ro] started: routing strategy = round-robin-with-fallback
examples-mysqlrouter-1  | 2022-08-30 12:03:57 routing INFO [7f790effd700] Start accepting connections for routing routing:bootstrap_ro listening on 6447
examples-mysqlrouter-1  | 2022-08-30 12:03:57 metadata_cache INFO [7f7948602700] Connected with metadata server running on my-ubuntu-2:3306
examples-mysqlrouter-1  | 2022-08-30 12:03:57 routing INFO [7f790d7fa700] [routing:bootstrap_x_rw] started: routing strategy = first-available
examples-mysqlrouter-1  | 2022-08-30 12:03:57 routing INFO [7f790d7fa700] Start accepting connections for routing routing:bootstrap_x_rw listening on 6448
examples-mysqlrouter-1  | 2022-08-30 12:03:57 metadata_cache INFO [7f7948602700] Potential changes detected in cluster 'cluster_lab' after metadata refresh
examples-mysqlrouter-1  | 2022-08-30 12:03:57 metadata_cache INFO [7f7948602700] Metadata for cluster 'cluster_lab' has 5 member(s), single-primary: (view_id=0)
examples-mysqlrouter-1  | 2022-08-30 12:03:57 metadata_cache INFO [7f7948602700]     my-ubuntu-2:3306 / 33060 - mode=RO
examples-mysqlrouter-1  | 2022-08-30 12:03:57 metadata_cache INFO [7f7948602700]     my-ubuntu-1:3306 / 33060 - mode=RO
examples-mysqlrouter-1  | 2022-08-30 12:03:57 metadata_cache INFO [7f7948602700]     my-ubuntu-0:3306 / 33060 - mode=RW
examples-mysqlrouter-1  | 2022-08-30 12:03:57 metadata_cache INFO [7f7948602700]     my-ubuntu-3:3306 / 33060 - mode=RO
examples-mysqlrouter-1  | 2022-08-30 12:03:57 metadata_cache INFO [7f7948602700]     my-ubuntu-4:3306 / 33060 - mode=RO
Test the frontend
Now if you try to access localhost you can see the Wordpress installation page:
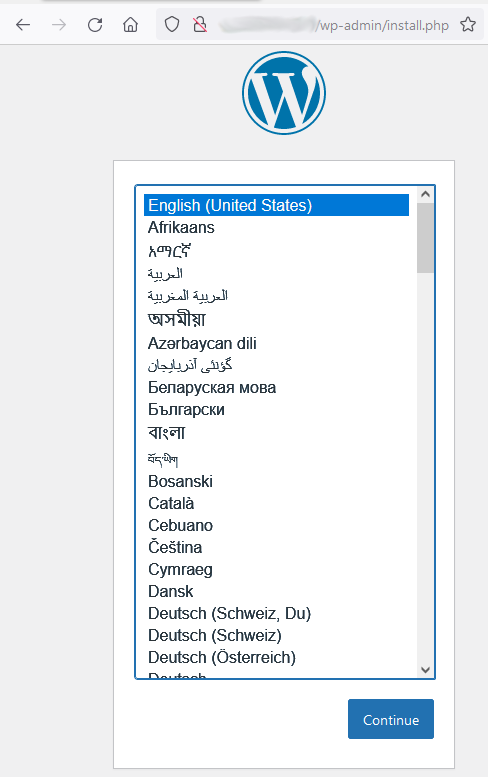
Install and configure WP, and now we are ready for some Chaos Monkey
Simulate disaster
To test WP reachability we can start this simple test:
while true; do curl -s -o /dev/null -w "%{http_code}" http://localhost; echo; sleep 1; done
200
200
now shutdown the RW node (in this case my-ubuntu-0):
root@my-ubuntu-0:~# sudo halt -p
Connection to 192.168.25.110 closed by remote host.
Connection to 192.168.25.110 closed.
and check the output of the test script:
while true; do curl -s -o /dev/null -w "%{http_code}" http://localhost; echo; sleep 1; done
200
500 # <- my-ubuntu-0 shutdown and MySQL primary switch
200
200
Now we check the cluster status from the second node, and we see that the cluster is still ONLINE and can tolerate one more failure:
root@my-ubuntu-1:~# mysqlsh root@localhost
Please provide the password for 'root@localhost': ******************************************

MySQL  localhost:33060+ ssl  JS > clu = dba.getCluster()
MySQL  localhost:33060+ ssl  JS > clu.status()
{
    "clusterName": "cluster_lab",
    "defaultReplicaSet": {
        "name": "default",
        "primary": "my-ubuntu-2:3306",
        "ssl": "DISABLED",
        "status": "OK_PARTIAL",
        "statusText": "Cluster is ONLINE and can tolerate up to ONE failure. 1 member is not active.",
        "topology": {
            "my-ubuntu-0:3306": {
                "address": "my-ubuntu-0:3306",
                "memberRole": "SECONDARY",
                "mode": "n/a",
                "readReplicas": {},
                "role": "HA",
                "shellConnectError": "MySQL Error 2003: Could not open connection to 'my-ubuntu-0:3306': Can't connect to MySQL server on 'my-ubuntu-0:3306' (110)",
                "status": "(MISSING)"
            },
            "my-ubuntu-1:3306": {
                "address": "my-ubuntu-1:3306",
                "memberRole": "SECONDARY",
                "mode": "R/O",
                "readReplicas": {},
                "replicationLag": "applier_queue_applied",
                "role": "HA",
                "status": "ONLINE",
                "version": "8.0.30"
            },
            "my-ubuntu-2:3306": {
                "address": "my-ubuntu-2:3306",
                "memberRole": "PRIMARY",
                "mode": "R/W",
                "readReplicas": {},
                "replicationLag": "applier_queue_applied",
                "role": "HA",
                "status": "ONLINE",
                "version": "8.0.30"
            },
            "my-ubuntu-3:3306": {
                "address": "my-ubuntu-3:3306",
                "memberRole": "SECONDARY",
                "mode": "R/O",
                "readReplicas": {},
                "replicationLag": "applier_queue_applied",
                "role": "HA",
                "status": "ONLINE",
                "version": "8.0.30"
            },
            "my-ubuntu-4:3306": {
                "address": "my-ubuntu-4:3306",
                "memberRole": "SECONDARY",
                "mode": "R/O",
                "readReplicas": {},
                "replicationLag": "applier_queue_applied",
                "role": "HA",
                "status": "ONLINE",
                "version": "8.0.30"
            }
        },
        "topologyMode": "Single-Primary"
    },
    "groupInformationSourceMember": "my-ubuntu-2:3306"
}
 MySQL  localhost:33060+ ssl  JS >
If you check WP at localhost is still available, the master now is the my-ubuntu-2 node. Now if we bring up again the my-ubuntu-0 node, the node wil rejoin the cluster and will get the updates from the other nodes:
root@my-ubuntu-1:~# mysqlsh root@localhost
Please provide the password for 'root@localhost': ******************************************

MySQL  localhost:33060+ ssl  JS > clu = dba.getCluster()
MySQL  localhost:33060+ ssl  JS > clu.status()
{
    "clusterName": "cluster_lab",
    "defaultReplicaSet": {
        "name": "default",
        "primary": "my-ubuntu-2:3306",
        "ssl": "DISABLED",
        "status": "OK",
        "statusText": "Cluster is ONLINE and can tolerate up to 2 failures.",
        "topology": {
            "my-ubuntu-0:3306": {
                "address": "my-ubuntu-0:3306",
                "memberRole": "SECONDARY",
                "mode": "R/O",
                "readReplicas": {},
                "replicationLag": "applier_queue_applied",
                "role": "HA",
                "status": "ONLINE",
                "version": "8.0.30"
            },
            "my-ubuntu-1:3306": {
                "address": "my-ubuntu-1:3306",
                "memberRole": "SECONDARY",
                "mode": "R/O",
                "readReplicas": {},
                "replicationLag": "applier_queue_applied",
                "role": "HA",
                "status": "ONLINE",
                "version": "8.0.30"
            },
            "my-ubuntu-2:3306": {
                "address": "my-ubuntu-2:3306",
                "memberRole": "PRIMARY",
                "mode": "R/W",
                "readReplicas": {},
                "replicationLag": "applier_queue_applied",
                "role": "HA",
                "status": "ONLINE",
                "version": "8.0.30"
            },
            "my-ubuntu-3:3306": {
                "address": "my-ubuntu-3:3306",
                "memberRole": "SECONDARY",
                "mode": "R/O",
                "readReplicas": {},
                "replicationLag": "applier_queue_applied",
                "role": "HA",
                "status": "ONLINE",
                "version": "8.0.30"
            },
            "my-ubuntu-4:3306": {
                "address": "my-ubuntu-4:3306",
                "memberRole": "SECONDARY",
                "mode": "R/O",
                "readReplicas": {},
                "replicationLag": "applier_queue_applied",
                "role": "HA",
                "status": "ONLINE",
                "version": "8.0.30"
            }
        },
        "topologyMode": "Single-Primary"
    },
    "groupInformationSourceMember": "my-ubuntu-2:3306"
}
Restore from complete outage
If for any reason all the servers went down, the cluster has to be restored from a complete outage.
To do this we have to connect to one instance, edit /etc/mysql/mysql.conf.d/innodb_cluster.cnf and set group_replication_bootstrap_group to ON and comment group_replication_group_seeds. We have now to restart MySQL:
vagrant@my-ubuntu-0:~$
vi /etc/mysql/mysql.conf.d/innodb_cluster.cnf

group_replication_bootstrap_group=on
#group_replication_group_seeds=my-ubuntu-0:33061,my-ubuntu-1:33061,my-ubuntu-2:33061,my-ubuntu-3:33061,my-ubuntu-4:33061

systemctl restart mysqld
For all the other (four) members we have to start the group replication:
vagrant@my-ubuntu-4:~$ mysqlsh root@localhost
Please provide the password for 'root@localhost': ******************************************

MySQL  localhost:33060+ ssl  JS > \sql # <- SWITCH TO SQL MODE
Switching to SQL mode... Commands end with ;
MySQL  localhost:33060+ ssl  SQL > start group_replication;
Query OK, 0 rows affected (1.7095 sec)
If the traffic on the cluster was low or absent the cluster will be ONLINE:
MySQL  localhost:33060+ ssl  SQL > \js
Switching to JavaScript mode...
MySQL  localhost:33060+ ssl  JS > clu = dba.getCluster()
MySQL  localhost:33060+ ssl  JS > clu.status()
{
    "clusterName": "cluster_lab",
    "defaultReplicaSet": {
        "name": "default",
        "primary": "my-ubuntu-0:3306",
        "ssl": "DISABLED",
        "status": "OK",
        "statusText": "Cluster is ONLINE and can tolerate up to 2 failures.",
        "topology": {
            "my-ubuntu-0:3306": {
                "address": "my-ubuntu-0:3306",
                "memberRole": "PRIMARY",
                "mode": "R/W",
                "readReplicas": {},
                "replicationLag": "applier_queue_applied",
                "role": "HA",
                "status": "ONLINE",
                "version": "8.0.30"
            },
            "my-ubuntu-1:3306": {
                "address": "my-ubuntu-1:3306",
                "memberRole": "SECONDARY",
                "mode": "R/O",
                "readReplicas": {},
                "replicationLag": "applier_queue_applied",
                "role": "HA",
                "status": "ONLINE",
                "version": "8.0.30"
            },
            "my-ubuntu-2:3306": {
                "address": "my-ubuntu-2:3306",
                "memberRole": "SECONDARY",
                "mode": "R/O",
                "readReplicas": {},
                "replicationLag": "applier_queue_applied",
                "role": "HA",
                "status": "ONLINE",
                "version": "8.0.30"
            },
            "my-ubuntu-3:3306": {
                "address": "my-ubuntu-3:3306",
                "memberRole": "SECONDARY",
                "mode": "R/O",
                "readReplicas": {},
                "replicationLag": "applier_queue_applied",
                "role": "HA",
                "status": "ONLINE",
                "version": "8.0.30"
            },
            "my-ubuntu-4:3306": {
                "address": "my-ubuntu-4:3306",
                "memberRole": "SECONDARY",
                "mode": "R/O",
                "readReplicas": {},
                "replicationLag": "applier_queue_applied",
                "role": "HA",
                "status": "ONLINE",
                "version": "8.0.30"
            }
        },
        "topologyMode": "Single-Primary"
    },
    "groupInformationSourceMember": "my-ubuntu-0:3306"
}
If the cluster has a high volume traffic at the moment of the complete outage. you have to probably run form mysqlsh:
MySQL localhost:33060+ ssl JS > var clu = dba.rebootClusterFromCompleteOutage();
Clean up
When you have done you can finally destroy the cluster with:
vagrant destroy

    my-ubuntu-4: Are you sure you want to destroy the 'my-ubuntu-4' VM? [y/N] y
==> my-ubuntu-4: Forcing shutdown of VM...
==> my-ubuntu-4: Destroying VM and associated drives...
    my-ubuntu-3: Are you sure you want to destroy the 'my-ubuntu-3' VM? [y/N] y
==> my-ubuntu-3: Forcing shutdown of VM...
==> my-ubuntu-3: Destroying VM and associated drives...
    my-ubuntu-2: Are you sure you want to destroy the 'my-ubuntu-2' VM? [y/N] y
==> my-ubuntu-2: Forcing shutdown of VM...
==> my-ubuntu-2: Destroying VM and associated drives...
    my-ubuntu-1: Are you sure you want to destroy the 'my-ubuntu-1' VM? [y/N] y
==> my-ubuntu-1: Forcing shutdown of VM...
==> my-ubuntu-1: Destroying VM and associated drives...
    my-ubuntu-0: Are you sure you want to destroy the 'my-ubuntu-0' VM? [y/N] y
==> my-ubuntu-0: Forcing shutdown of VM...
==> my-ubuntu-0: Destroying VM and associated drives...